THE NEW LED LIGHT STRIPS- GREAT IN LIGHTING COMFORT, FLEXIBLE IN APPLICATION
Use the flexible options of waterproof led light strips for creative light design. The more and more widespread LED technology scores over classic filament technology with higher efficiency and service life. At the same time, the small diodes can be used in a particularly creative way thanks to their compact size.

Waterproof LED strips with constant
distances between the LEDs are suitable for various lighting scenarios. Here
you will find out how you can attach LED strips correctly and learn about
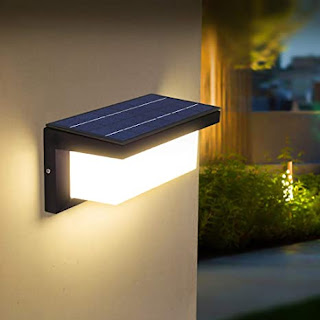
creative design ideas for use in offices, residential complexes, shops, and
underground car parks.
LED STRIPS:
INSTRUCTIONS FOR CORRECT ASSEMBLY
Smart + OUTDOOR FLEX
You can easily mount LED strips with
self-adhesive tape on the back on many smooth surfaces. However, the length is
limited: with 12V systems, the LED strip should be a maximum of eight meters,
with 24V systems a maximum of twelve meters.
You use a repeater for longer distances.
Models that are already wired are plug-and-play solutions and can be connected
particularly quickly.
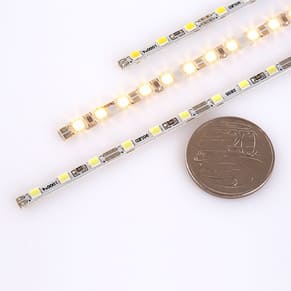
1. Shorten or lengthen LED strips
You simply cut through the LED strips
with scissors. Many manufacturers mark possible interfaces with a scissors symbol
or you can recognize the points by three drawn lines. There are quick
connectors such as the Slim connect system for connecting two individual LED
strips. When connecting two strips, make sure that the polarity is identical.
2. Around the corner
If the LED strip should continue to
run around the corner, a contra-angle connector is used. Alternatively, there
are LED light strips that can be bent up to an angle of 60 degrees.
3. Connect the LED strips to the
power supply unit
Select the power supply unit that
matches the LED strips. Both must have the same tension. As a reminder, the
calculation: wattage per meter x length of the LED strip. A 12V LED strip with
a power consumption of 5 W / m must be 3.8 meters long and connected to a
transformer with a capacity of at least 19 W. Think of a recommended
performance buffer of 20 percent. Pay attention to the correct polarity when
making the connection.
4. Optional: dimmer or controller
With single-color LED strips, you can
continuously regulate the brightness with an interposed dimmer. You also
connect an LED controller to change the color of RGB LED strips. In the case of
RGB LED strips, the connection cable is four-core:

5. The power connection
Now you connect the controller to the
power supply unit, if necessary, and the power connection is made. You connect
the mostly brown or black outer conductor to the connection terminal L, the
blue neutral conductor to the connection N, and the yellow/green protective
conductor to the terminal with the protective conductor symbol.

Comments
Post a Comment